It was January 2017 when I decided to do the upper level starting with Park Head. This meant building directly over the yard of Owen Sound. I kept in mind that the upper level would not be easy to access in a couple of places and I knew that I would have to work hard to meet this challenge. I wanted to use a light material and metal shelf brackets. Also of concern was maintenance of the upper level. I needed materials that would require little or no maintenance and would not be as affected by the weather as wood. This meant metal and plastic. I knew that Jim Martin, a member of the S Scale Workshop and really great modeler in his own right, had experience with steel 2 x 4’s so I decided to see what could be had to build the upper level using some type of metal that was light and easy to drill and tap. I checked out the Internet to see what was available locally. Aluminum structure shapes were available at the three major building supply outlets. I decided on 1” aluminum ‘L’ trim which I will call girders that is used for doors etc. It was not as cheap as wood but nice and thin at 1/16” thick and I could easily get 8’ lengths in 1”x 1”, perfect for the 1″ thick Styrofoam. I did have to make certain that the girders were not distorted or bent when I selected them. Once in a while when I found one that was bent that I actually could use, I managed to squeeze out a discount from the store. Sweet!
Steel shelf brackets are easy to get in 10” x 12” and 12”x 14”. They are pretty much as cheap as you can get and they come in white too which means they kind of blend in unobtrusively. Not taking up too much space, they can be hidden behind a back drop. My idea was to use the shelf brackets and attach the aluminum ‘L’ girders to the ends using 4-40 nuts, screws and washers. Why 4-40? I had a surplus supply from my early attempts to build an S Scale CNR K-3 Pacific. I settled on the smaller 2-56 screws for that project. All drilling and tapping were done on one of my Unimat 3’s which is set up as a drill press/milling machine. I used centering drill bits to ensure accuracy.
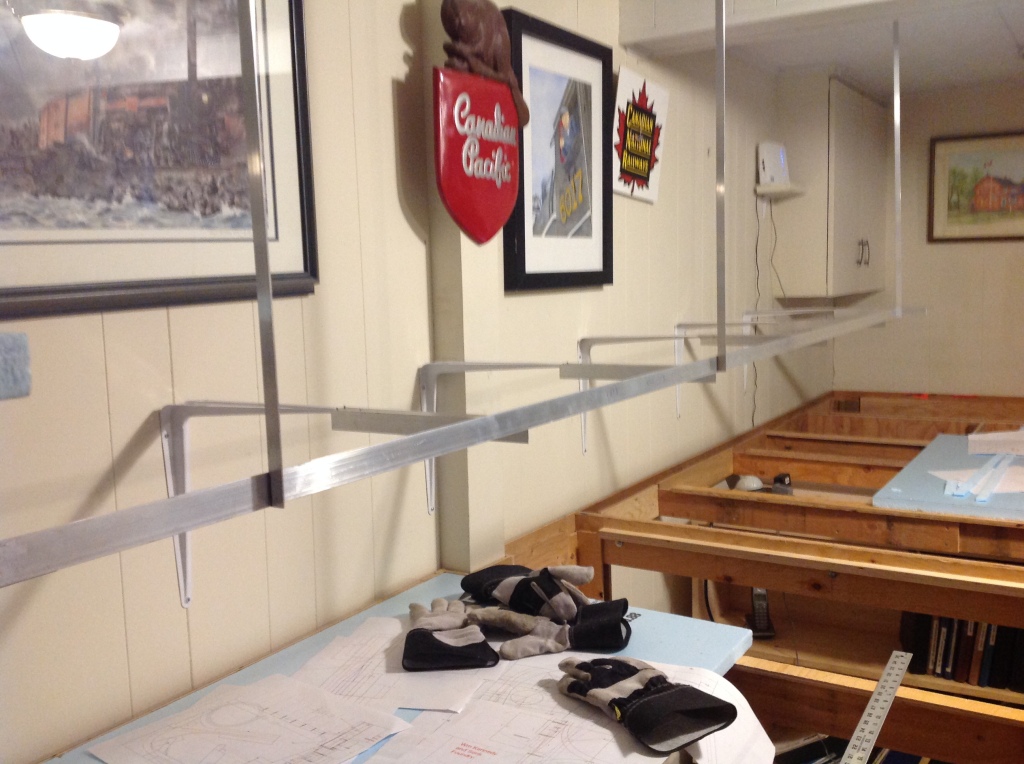
Initial results proved that my idea was going to work but as you can see, ‘reaching access’ over the north end of the yard would be an issue. I almost constantly checked for level.

I discovered things which may look great in drawings and on paper don’t always work out in the real world. This has happened time and time again. The shelf brackets worked well up to 14” but the reach from the north end of the Owen Sound yards was way too great to be able to access the upper level. Some adapting was necessary. I decided a 10” inch extension would solve the problem of being able to access the motive power and rolling stock on the upper level in this area. I then cut some of the 1”x 1” aluminum ‘L’ stock into 12” lengths, drilled and tapped them and attached them to the 14” leg of the brackets. Tee and ‘L’ brackets were added to the ends to support the main 8 ’x 1”x 1” aluminum ‘L’ girders which provided the front shelf edge for the Styrofoam.

Here are some of the braces and splice plates and bolts I used in the construction of the upper level. The 6 x 1/2” screws were used to fasten the steel shelf brackets to the wall. In some cases, I needed to supplement the screws that went into the walls with ‘No More Nails’ to secure them more.

I also use just straight splice plates, sometimes known as bars, to join the underside of the aluminum lengths together.
I am not certain if it is acceptable to name stores in a blog because it might be deemed promotion, but I can tell you this, different stores have better prices and quantities for certain things. I have to visit 3 different ones to get the best prices and quantities for the materials I was using so I found it was necessary to try to wait until I needed enough from one to eventually go there unless two were close enough together. It would be nice to be able to one-stop shop.
The extensions to the steel brackets gave me the reach but the brackets were now kind of floppy. After Trevor Marshall and I discussed whether to add braces to the bottom or go up, I decided that adding vertical supports to the ceiling would alleviate this problem. To make the supports as visually inoffensive as possible, I used ½”x½” aluminum ‘L’ shape. I had to custom-make some brackets from brass rectangular tubing and extra aluminum 1″ x 1″ ‘L’ to attach these verticals to the ceiling joists.
Building over the South end of the Owen Sound Yard required some extra support. I built a cage-like affair using steel 90 degree corner braces to anchor ¾”x ¾”aluminum ‘L’ pieces as uprights and used 1”x 1” ‘L’ turned down to form a sort of rack on top.

I threaded the aluminum ends as well so that the 4-40 nuts would snug down and become doubly tight. Occasionally if the thread did get stripped, I used red thread lock liquid to keep things tight. Note, that lock liquid will eat into Styrofoam. I am hoping that this approach has made the upper level somewhat easy to dismantle when the last rule of Murphy’s Law of rail modelling comes into play.
More bracing was added to the top rack to support the Styrofoam. 1/16”x2” flat pieces of aluminum were used as cleats to make the bracing flush and provide more support. Later, when I found a commercial source of sheet styrene, I found that 0.060” is equivalent to 1/16” and would use that instead. Cheaper by the kilo!

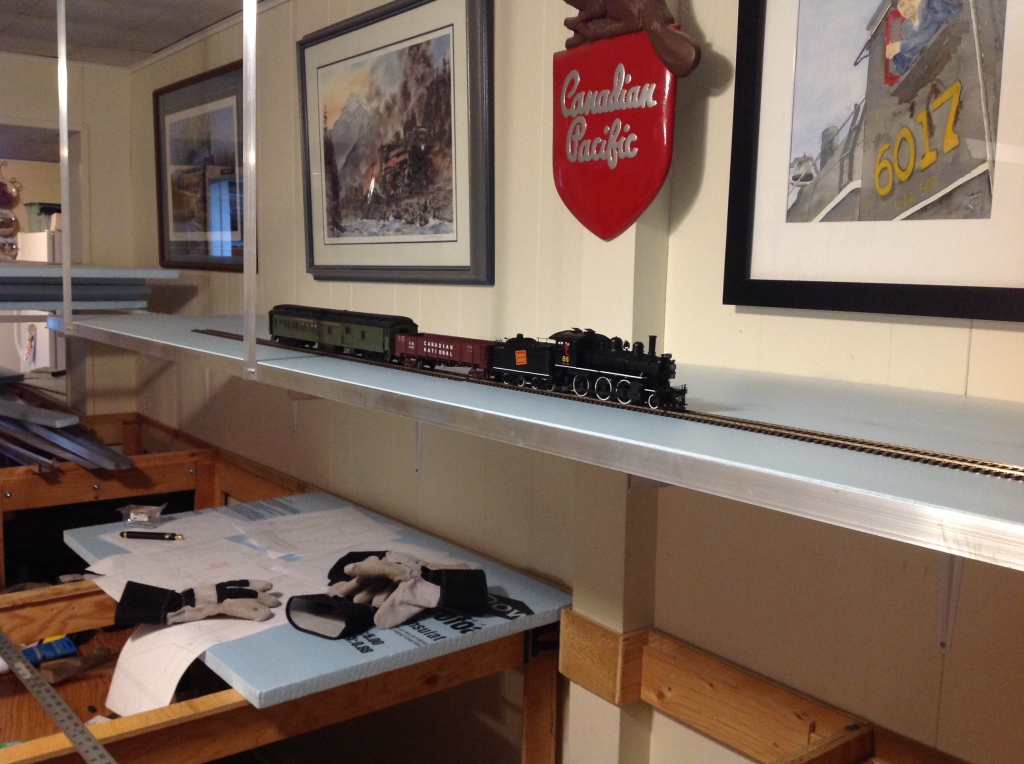
After some creative linking between the rack and the shelf along the wall, the Styrofoam was cut and added but not glued down. I wanted to be sure that no future unaccounted for altercations and alterations would ruin the Styrofoam.
The next installment will cover doing the frame work for the lift out section of the wye and proceeding down the wall to the ‘east’ towards the helix.

Great stuff Andy; you’re making great progress! Are you going to power turnouts on the upper level or use manual throws? Not much room for machines. I know you had mentioned using servos; I guess that’s the best option here. Continued success!
LikeLike
Thanks, Brian. Cheers, Andy
LikeLike
Neat.
You could also use ¼” or M6 threaded rod to suspend the framing from the ceiling. It might not be quite as cheap, but would be even less obtrusive and infinitely adjustable to get the levels. You could use one of your Unimats to make some ceiling roses, centre threaded for the rod and two holes for fixing to the ceiling. Just a thought.
Simon
LikeLike
Great ideas. I am not one for fixing something that ain’t broke though so it won’t get changed. I would have probably tried that if I had thought about it. However I will be using the threaded rod method for the helix and a large transfer table. I don’t find the 1/2″ L obtrusive though and it was not too difficult to level as I used elongated holes in the brackets. Cheers, Andy
LikeLike
After I had posted, I realised that the post was a bit “retrospective”, but the idea is out there now!
Now you know why you should have listened to Trevor and started blogging sooner: you get useful feedback in a timely manner!
LikeLike
Actually, Trevor did not suggest doing a blog until 2018. Things were well under way then. I recorded progress for maintenance purposes and to do submissions for the Dispatch which now would be redundant.
LikeLiked by 1 person
Aha.
LikeLike